pin it button

Showing posts with label Stamping Techniques. Show all posts

Monday, April 24, 2017

Embossed Card and Embossing Tips


To say I am embossing obsessed would be an understatement.  It is the thing that got me into stamping about 30 years ago, and it never gets old for me.

Story: In 1992, I was walking through a boutique with my friend, Dallas.  We passed a stamping booth and I saw an elegant card with a gold Christmas Tree embossed on a beautiful creamy off-white card.  It made my heart do a few extra thumps in my chest. I had to know how to do that. I asked the lady at the booth to show me how to do it. She showed me. I bought everything I needed, and embossed 200 Christmas cards that year.  I was hooked.  Sidenote: about 9 months after that I stumbled on to D.O.T.S. (now Close To My Heart), signed up as a consultant, and the rest is history. I'm still embossing up a storm!

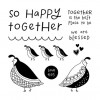
Enough nostalgia.  Let's talk about embossing and this darling stamp set.  It's only available in April (so for less than one more week!) and is yours for only $5 ($12.95 savings) with every $50 purchase (before shipping and tax). Order $100, get 2...and so on. When ordering on my website, you'll be prompted to add your set(s) before checking out.

April Stamp of the Month - Flock Together

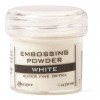
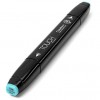
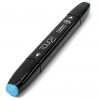
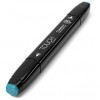
For this card, I embossed in white. I love ALL embossing, but I'm very partial to white!  I love the look. After embossing the birds, I used some of our blue tone Shin Han Alcohol Markers to add a bit of color.


Here's are a couple little embossing tips for you to help you get a really nice, clean embossed image:
  • Before stamping your paper with embossing ink and adding the embossing powder and heating, first rub a dryer sheet across the surface. This helps with static cling and makes your embossed images much cleaner.
  • Keep a very fine paint brush handy. After you've stamped your image with Versarmark Ink and sprinkled your embossing powder on, use the fine tip paintbrush to carefully brush away any grains of powder that are not sticking to the image.  Then heat.  Remember that any embossing powder that is on your paper is going to melt and emboss once you heat it. You don't want a "speckled background" of melted embossing powder.



Monday, January 30, 2017

Valentine Card and Embossing Instructions


This cards is almost exactly the same as another card I posted earlier in the month. This is the card I'm talking about. As you can see, the only real difference is that I switched out the patterned papers with cardstock. I wanted to show you how, with just a few minor changes, you can take the same design and give it a whole different look.


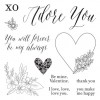
I created both cards with the January Stamp of the Month (Adore you). This stamp set is only available in January (that means your time to get it is running out quickly...don't miss it!), and is yours for only $5 ($12.95 savings) with every $50 you order (before shipping and tax). When ordering on my website, you'll be prompted to add your set(s) before checking out. Easy Peasy, ain't no teasy!


One of my favorite stamping techniques is embossing.  As you can see on this close up, it gives anything you make an elegant feel.  My favorite colors to emboss in are gold (as on this card), silver, and white (love it on a dark or bright color. It just pops, like on this card I shared earlier this month, also made with the January Stamp of the Month). As elegant as it looks, it easy as pie!


1.  Stamp the image you wan to emboss in Versamark Ink.
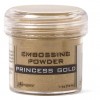
2.  Sprinkle embossing powder of your color choice on top of stamped image.
3.  Shake off excess powder (I do this onto a sheet of paper so I can bend it and easily pour it back into it's jar to use again)
4.  If you still have some grains of embossing powder sticking to your paper, not the image, use a small paint brush to carefully brush those off. If  you don't they will emboss too when you move on to step 5.
5.  Using your heat gun, wave the heat over the image until you see it "melt" into the embossed image you were going for. I saw "wave" because if you just hold the gun and let the air blow right in one spot, you can sometimes scorch your paper.  No bueno!

Voila!  Embossing complete!  I've included a full list of all of the products I used on this card below, complete with photos and links for your convenience.


Tuesday, January 17, 2017

Valentine 3 Card Set with 3 Artwork Tips

3-card set made with the January Stamp of the Month (Adore You) in Raspberry, Pansy and Emerald

Valentine's Day is just around the corner and we are here to help you prepare with a $5 Valentine stamp set.  No kidding! Keep reading to find out how to get it.


How about if I first tell you how to get this beautiful set for only $5, then I give you some fun artwork tips for these cards?  Okey dokey!

This beautiful set (Adore You) is only available in January and is yours for only $5 ($12.95 savings) with every $50 you order (before shipping and tax). When ordering on my website, you'll be prompted to add your $5 set(s) before checking out. Easy, peasy!

Now, on to more details and tips for these cards:

4 1/4" x 5 1/2" card, top fold with bottom corners rounded


1.  When stamping your rows of hearts, lay a piece of paper straight across the card.  Position your heart on your acrylic block and let the bottom tip of each heart stamp just above the edge of the paper.  This will give you your first row of hearts, and it will be nice and straight.

2.  For the second row, turn your stamp upside down and position the tip of each heart between the two hearts in the row above.  Repeat steps 1 and 2 again until you have filled the front of your card with hearts.


3.  When embossing, stamp in our clear Versamark Pad, sprinkle your White Embossing Powder on top. Shake off the excess.  You may still have a few little grains of powder sticking to your cardstock. For a nice crisp image, with no "embossing powder polka dots" scattered around  your image, be sure to use a tiny paint brush to carefully brush any of those little stragglers off. Even if the powder isn't sticking to the stamped image, if it's on your cardstock, it will emboss when you heat it.

I've included a list of all of the products I used on this card at the very end of this post, complete with photos and links for your convenience.

A set of cards like this is a great gift for a friend, or fun Valentines for you to hand out to those you love!


LinkWithin

Related Posts with Thumbnails