pin it button

Wednesday, April 12, 2017

May Play Group Scrappin' and Card Makin' Classes and Kits (Some Kinda Wonderful)


The deadline to order your long-distance kits or sign up to attend May classes in person is Wednesday, April 19  by 10 pm MDT.  Just call or email me to sign up (801.360.9896, pedermom@aol.com).  Long distance kits will be shipped no later than the first week of May.

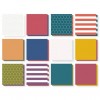
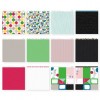
We'll be making three 2-page 12" x 12"  layouts (Layout #3 has 2 fun pocket page inserts) using our bright and vibrant Some Kinda Wonderful papers (I just love these striking colors!) and matching accessories, as well as adding a 9 card option (3 each of 3 designs) to the layouts this month. 

  • To create all three layouts plus the pocket page inserts for Layout #3, all you need is the Basic Kit. 
  • If you want to add the 9 cards, and will be attending the class in person, you'll need to get all or part of the Better Kit  (just order the items from this kit you don't already have). If you are adding the cards and are participating long-distance, you'll need the Best Kit.
  • If you just want to make the cards, I've added that option as well. If you are attending the class in person, just order the Cards Only option. If you will be making them long-distance, order the Cards Only Option plus the stamp/thin cuts set in the Best Kit.
  • If you are participating long-distance and want to do both the layouts and the cards, you'll want to order all or part of the Best Kit (just order any items you don't already own).   
Please call or email me if you have any questions and I'm happy to answer them for you (801.360.9896, pedermom@aol.com).

  May Dates and Times to Choose From:
  • Thursday evening, May 18 from 7-10 pm in Pleasant Grove, UT
  • Friday morning, May 19 from 10 am - 1 pm in American Fork, UT
After the layout and card photos, you'll find the shopping list.  In order to participate, you are only required to purchase the Basic Kit or the Cards Only kit, but you are more than welcome to buy the Better or Best Kits, or to pick and choose from some of those items to add to your Basic Kit.  You'll see the kit totals in the shopping list below. I've also included a products list, complete with photos and links, at the end of this post for your convenience.  Also, please go back and read the bolded paragraph above to be sure you understand which kits get you just the layouts, which kits get you just the cards, and which kits give you both.

Feel free to click on any image to see it larger and in more detail. For each layout, I've included a photo of the layout with photos and without photos (with measurements included for each of the photo mats).

Layout #1 - #today:
Layout 1 with photos

Layout 1 without photos

Layout 1 details

Layout #2 - Best Friends:
Layout 2 with photos

Layout 2 without photos
Layout 2 details

Layout #3 - #LIFE:
Layout 3 with photos

Layout 3 without photos
Layout 3 with Pocket Page Inserts
9 Cards (3 each of 3 designs):


Shopping List: (links and photos of all of the items in the kits, as well as supply items that are needed to complete the layouts, are at the end of the post so that you can see what each item is.)

Basic Kit (this kit will get you everything you need to complete the three 2-page layouts):
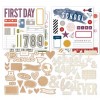
  • Some Kinda Wonderful Workshop Your Way (includes SKW Paper Packet, SKW Complements, 4 extra sheets of Cardstock {White Daisy}, Black and White Dots,  White Twine)
  • 7 extra sheets White Daisy Cardstock
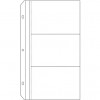
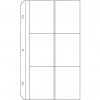
  • 2 PML Pocket Page Insert Protectors (Design 1 and Design 3)
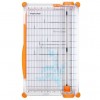
  • Karen's Cutting Guide
Total including shipping and tax for those attending in person: $36
Total including shipping and tax for those participating long-distance: $41
Total if you want me to cut your papers for you:  add $5 to your total

Better Kit* (this kit gives you everything you need to make the additional 9 cards if you are attending in person. Karen will provide the stamp sets and thin cuts for your use at class. If you are not attending in person and want to make the cards, you'll also want to get the things in the Best Kit):
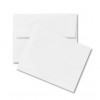
  • 9 card bases with envelopes
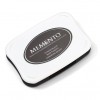
  • Memento Black Pad
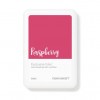
  • Raspberry Pad
  • 3" x 4" Flip Flaps
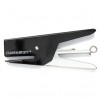
  • Mini Stapler
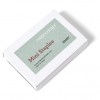
  • Mini Staples
Total including shipping and tax for those attending in person: $81*
Total including shipping and tax for those participating long-distance: $86*
Total if you want me to cut your papers for you: add $5 to your total

Best Kit* (this kit gives you the stamp set you need for the cards {if you are attending in person, I will have them for you to use at class.:
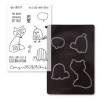
  • Some Kinda Wonderful Stamp Set and Thin Cuts Bundle
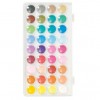
  • Watercolor Paints
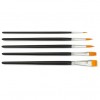
  • Watercolor Paint Brushes
Total including shipping and tax for those attending in person:  $132*
Total including shipping and tax for those attending long-distance: $137*
Total if you want me to cut your papers for you:  add $5 to your total
 
Cards Only Kit (this kit is if you JUST want to make the 9 cards)
  • 9 card bases with envelopes
  • 1 sheet White Daisy Cardstock
  • White Twine
  • Black and White Dots
  • Various Pieces from the Some Kinda Wonderful Paper Pack
  • Black Memento Pad
  • Raspberry Pad
Total including shipping and tax for those attending in person: $31
Total including shipping and tax for those participating long-distance: $36

*at this purchase level you qualify for the April Stamp of the Month for only $5 (Flock Together).



Monday, April 10, 2017

Family Layout and Some Technique Tips


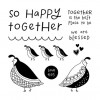
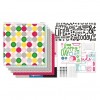
When I saw the darling April Stamp of the Month (Flock Together) I knew it would be perfect for a family layout. This is our daughter, Kori and her beautiful family.

I have some fun technique tips to share that I used on this layout, but first I want to remind you how you can get this stamp set.  It's only available in April and is yours for only $5 ($12.95 savings) with every $50 you purchase (before shipping and tax).  Purchase $100, get 2...and so on. When shopping on my website, you'll be prompted to add your set(s) before checking out.
Here are a few close up details of the layouts with some technique tips below.  Also, at the very end of this post, you'll find a products used list, complete with links and photos, for your shopping convenience.


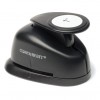
  • Technique Tip #1:  Do you love the look of a large scalloped square under the focal point of a layout (see top left and bottom right photos in the photo collage above)? I do!  But, I don't always love lugging my Cricut out to cut one, nor do I want to search the local craft store to find a pre-cut one.  I have the perfect solution....a CIRCLE PUNCH!  WOO HOO! I used the 1" circle punch from Close To My Heart to punch White Daisy Cardstock circles then adhered them under that focal point square with about 1/2 of them hiding underneath so that you just see the scallops poking out.  Easy, peasy and so cute!
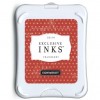
  • Technique Tip #2:  I really wanted a touch of red on this layout. I  added a few hearts stamped in Cranberry ink, but I wanted a red border too. I didn't want to add any more bulk to my layout, so instead of adding another layer of cardstock, I drew a double border with a ruler and journaling pen, then filled that in with my Shin Han Carmine Alcohol Marker. You can see this in the top right photo.
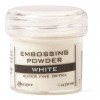
  • Technique Tip #3:  One of my very favorite looks is White Embossing on colored cardstock. I think  it's such a beautiful look, easy to do, but one we forget about.  I used this technique on the title. I just embossed the words in white on Peacock Cardstock, dovetailed the ends, and my title was ready! Fun!  BONUS TIP: Did you notice that I stamped the title with the words all in a row, instead of stacked like you see it in the photo of the stamp set?  That's easy to do! Just take your scissors and carefully cut the words apart. Then you can put them onto your stamp black however you choose...all lined up, or stacked. Cool beans!
  • Technique Tip #4:  Pop it!  I used two different thicknesses of 3D Foam Tape on this layout, the regular and the thin. I love the dimension popping a few things gives a card or layout, and by using a few different thicknesses, you can add even more dimension.  I used Thin 3D Foam Tape under the title strip, and Regular 3D Foam Tape under some of the quail and hearts.
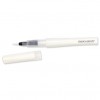
  • Technique Tip #5:  Don't forget that adding a little shimmer can be just the perfect touch. I used my handy dandy Clear Shimmer Brush to add some shimmer to each of the quail and to each of the Cranberry stamped hearts (see top left corner photo).  Love that look! 


LinkWithin

Related Posts with Thumbnails