pin it button

Thursday, February 27, 2014

FREE Embossing Folders!

Sneaky Peeky!
The "Embossing is Boss" special ends with February. Don't miss out on FREE embossing folders. Head to my website to order: www.leavealegacy.ctmh.com

The photo above is a sneak peek at a card I made using the March Stamp of the Month (Happy Place) and the Chevron embossing folder. You may be able to tell that I gently sanded my chevron design after embossing (notice that I left that part in focus and blurred the rest. Tricky! That is so you'll come back to see the whole card in March).  I love the sanded dry embossed look, and because Close To My Heart's cardstock has a white core, it is especially beautiful to sand!  Be sure to check back in a few days to see the whole card.


Tuesday, February 25, 2014

Hey, Foxy Card with the February Stamp of the Month


This little card was quick and easy. That's cool, because at Close To My Heart we want to create beautiful things, but help you make them "faster, simpler, easier."  Did you know that's one of our company slogans?  Nice!

I started with a 4" x 5 1/4" piece of White Daisy Cardstock, stamped the three hearts in Lagoon Ink, Cotton Candy Ink and Honey ink on a scrap of White Daisy Cardstock, then cut them out and mounted them in foam tape across the top center of the White Daisy Cardstock piece.  The words I stamped in Saddle ink directly onto the White Daisy Cardstock piece below the hearts.  I did a couple of rows of washi tape across the bottom and tied a quick bow around the middle. I then created a 4 1/4" x 5 1/2" card from saddle cardstock (I cut it 11" x 4 1/4" so that I had a top fold card), mounted the finished White Daisy Cardstock piece on the front and....voila! Faster, simpler, easier is right!  Boo ya!


I used the darling February Stamp of the Month set (Wild About Love) for all of the stamping.  This set is only $5 ($17.95 value) with a $50 order.  Hurry fast. This set is only available during February.  You can order on my website 24/7, and you'll be prompted to add this set before you check out.
February Stamp of the Month: Wild About Love


Wednesday, February 19, 2014

Embossing Techniques and Instructions

As you know (and if you don't, you should!) Close To My Heart's embossing folders are all the rage. During February only, if you purchase 2 packages of colored cardstock (single colors or combo packs both qualify. White Daisy or Colonial White packages don't.), you get an embossing folder ($8.95 value) absolutely free. Of course, you can also purchase as many folders as you want! You can purchase and get this deal on my website through the end of the month. Our embossing folders are 5" X 7" folders and have the most wonderful, deeply embossed designs.

Today, I thought I'd share a few fun techniques with the folders.  I have chosen to use Crystal Blue Cardstock and Twilight Ink with the Quatrefoil folder on the examples I will be showing you today with the different techniques.

Technique #1 - Plain: This is what a piece of paper looks like just simply run through your embossing machine and the folder. 


Technique #2 - Sanding:  After embossing your paper, try gently sanding it with a fine grit sandpaper. I recommend going one direction only so as not to tear your paper. Close To My Heart Cardstock has a white core, so you get a pretty white pattern. This example I have sanded quite a lot, but you can sand less for a more subtle white pattern.

Technique #3 - Ink Direct to Pattern:  After embossing, take your stamp pad and rub it directly on the raised pattern.  You can also use a sponge but I prefer the direct from the pad inking method for this look.

Technique #4 - Ink Direct to Embossing Folder: For this technique, you will want to rub your ink pad directly to the inside of the embossing folder. If you rub the positive (pokey outie) side, you'll get the look on the right. If you rub the negative side (the innie side), you'll get the look on the left.

Technique #5 - Embossing Long Strips of Paper:  Most embossing folders make that impossible, but leave it to Close To My Heart to take a great idea and take it one step further. The top of our folders have a 4 1/2 slit in them. To emboss a strip (great for a 12" x 12" layout!), place the top portion of your paper in the folder and run it through your machine. After that, pull your strip up through so that you can emboss the bottom portion. Be sure to line up your pattern with what you've already embossed.

Here is a photo of the embossing folders we carry. The designs are so versatile and right on trend.


If you don't already have an embossing machine, I suggest the Cuttlebug. That is the one that I have had for years.  I did a little looking for you and I found a killer deal on one at Walmart at this link.  Neither Cuttlebug nor Walmart are paying me for an endorsement.  I just want you to get the best machine and best deal possible. Everything you need to begin using our embossing folders will come with your machine.  By the way, the Big Shot is also a great machine.


Monday, February 17, 2014

Embossing is Boss Simply Inspired Bog Hop


Welcome to another Simply Inspired Blog Hop!  I love being part of this group of talented Close To My Heart women and that periodically we can all combine our talents to give you a hop that is sure to inspire. This time we've chosen to focus on the brand new Close To My Heart embossing folders. Hold onto your hats. This is a BEAUTIFUL hop!


If you have come here from the classy and creative Debbi Fournier's blog you are on the right path. This blog hop is a great big circle, so you can start here and work your way all around. If you get lost along the way, you'll find the complete list of participating consultants here.

Card box closed: inside are 5 matching cards and envelopes
I chose to create a Card Box filled with 5 matching cards and envelopes, all using a bit of dry embossing on them. I focused on 2 of the new embossing folders:  the Dots and the Quatrefoil  folders.  We have 3 other designs to choose from though!  I also used the Ariana papers, matching Complements Dimensional Elements, Ariana Assortment, some Bitty Sparkles and our Trinkets Wooden Shapes. I sponged the edges of a few things using the Cashmere Pad and a Round Sponge and I lightly sanded the dry embossed cardstock pieces with a fine grit sandpaper from our Sanding Kit to give it a bit of a shabby chic look, which I thought went perfectly with the look of the Ariana papers.  At the end of this post, you can find photos and links to these products on my website.


Ariana Cards that go inside the box (I also included envelopes but didn't include them in the photo)
 
Card box open with cards and envelopes inside


Now hop on over to the beautiful and brilliant Sheri Rottler's blog to see her work!  Be sure to visit all of the Close To My Heart Consultants in the hop to get some great crafting ideas.  Contact me or shop directly from my website to get your products from this beautiful new catalog today. 

Don't forget that when you purchase 2 packages of colored cardstock this month, you get an embossing folder of your choice for FREE ($8.95 value). You can do that right on my website.


Wednesday, February 12, 2014

A February Stamp of the Month Card and Pedersen FUN the Past Few Weeks!

5x7 Card I made using the February Stamp of the Month (Wild About Love)
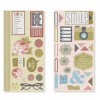
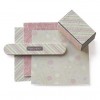
We'll start today with a fun February Stamp of the Month card.  I had fun playing with this set and hope you will too. It's yours for only $5 ($17.95 value) with every $50 you spend (before shipping and tax) in February.  If you are ordering from my website, you will be prompted to add it before you check out.


Coincidentally, this card also fits the 
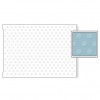
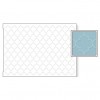
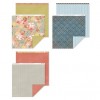
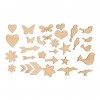
Moxie Fab World Hexagon Challenge this week.  You can see all of the products I used on this card as well as links to them on my site at the bottom of this post. Don't you just love those hexagon chipboard shapes? They are called 
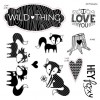
Irresitibles Hexagons and come as white chipboard with a clear embossed pattern on the top. You just rub a little ink on top with a sponge and the design shows through. COOL BEANS! The heart and sentiment are both from the Stamp of the Month set.

There has been so much going on the past few weeks, and I thought maybe I ought to share some of our Pedersen adventures with you.

Let's start with the twins' 2nd birthday party.  Kori outdid herself with the Minnie and Mickey theme.  She really is AMAZING at the party thing!  It is so much less stressful being the grandparent.  Actually, my parties never looked like this anyway.  She puts me to shame!

We had Dan and I, Kori, Rick and their family, Tannon and Brookley, and Rick's side of the family there for the party. Unfortunately Easton and Daysha and Sage couldn't come up for the party. We missed them!

-->
Livvi and Street had a Minnie and Mickey themed 2nd birthday party.

Livvi patiently waiting for it to be time to eat
 
Tannon keeping Street occupied while the food was prepared
Here are Tannon and Brookley AFTER Street was done honking Tannon's nose
Kori...the mom and party planner extraordinaire!
Daci was such a cute big sister at the party by helping keep the twins happy and occupied
Street getting ready to devour his cupcake
Kori, Street, Livvi and Rick
Livvi is ready to eat her cupcake too
Dan and I with Street
About a week after the twins' party, it was time for the Superbowl.  Unfortunatley I forgot to take pictures of that, which maybe wasn't such a bad thing. We are Bronco fans and maybe this Superbowl is better off forgotten.  Easton and Daysha were able to come up this weekend and we loved having them here with all of us for our traditional Superbowl party. We'll get 'em next year, Broncos!

Dawson is, as most of you know, serving a mission in Australia for our church. It is a 2 year mission and he has been gone 8 months now, which means he's 1/3 of the way done! We miss him! Here are a couple of recent pictures of him on this mission:
Dawson is 2nd from the right
Dawson is on the right. They saw this graffiti while out working one day and had to have a pic
While on his mission, Dawson has learned to play a little guitar.
In the meantime, Tannon and Brookley got their engagement photos taken. Their wedding is coming up on March 12...one month from today! Here is one of the photos. I thought they turned out so beautifully.

Sage turned 6 months!  I don't know how the time has gone so quickly. Easton and Daysha sure know how to make beautiful babies! I think they need to hurry and make another one. Lol.
Our sweet little Sage
Lastly, we had Brookley's bridal shower the other night and it was not only fun, but beautiful! We had about 35 people attend and they came ready to party (and to shower Brookley with amazing gifts).  Kori was in charge and she did an awesome job!


Well, if you're still with me, thanks for hanging in there!  The products I used on my card and the links to them on my site are below.  Have a GREAT day!


LinkWithin

Related Posts with Thumbnails