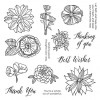
THANK YOU! Thank you for following my blog and enjoying the things I post. If I could send a thank you card to each of you, my thousands of followers, I would! Since that is near impossible, consider yourself being sent this fun card virtually, a card I made with the December Stamp of the Month.
This stamp set is only available in December, and is yours for only $5 ($12.95 savings) with each $50 you order (before shipping and tax). Order $100, get 2...and so on. When ordering on my website, you'll be prompted to add your set(s) before checking out. Also, remember that between now and December 25, I am sending THREE handmade cards to anyone who orders $25 or more (before shipping and tax) on my website (see here). WOO HOO! You might even get this exact card as one of the three.
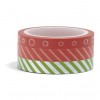
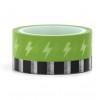
Do you have left over rolls of washi tape that you just aren't sure what to use on? Why not use them to create a fun diagonal pattern on a card, like I did on this one. In addition to some current and past washi tape, I also used Shin Han Markers on my flowers to create some color and personality for this card. I have found that I send thank you cards more than any other kind of card, so I try to stay stocked up on them all the time. This one was quick and easy, but it's fun and bright, and I suspect anyone would love to receive one, don't you? How about if I share some step by step instructions for this card with you, as well as adding a products used list at the very end of this post. Remember that a few of these washi tapes are retired, but the good news is that most of us have a collection, so you can just pull from your collections for the ones that are no longer available.
Thank You Card Instructions:
1. Cut all paper needed. You will need:
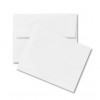
- Standard size white card (4 1/4" x 5 1/2") or make your own by cutting a White Daisy piece of cardstock to 8 1/2" x 5 1/2" and folding in half.
- White Daisy Cardstock: 4" x 5 1/4", 4" x 1", 2" x 2" (for stamping and cutting out flowers)
- Black Cardstock: 4 1/4" x 5 1/2", 4" x 1 1/4"
3. Stamp the "thank you" stamp on the 4" x 1" piece of White Daisy Cardstock, positioned like you see in the photos above. Adhere this strip to the 4" x 1 1/4" Black Cardstock strip, centered.
4. Adhere washi tape to the 4" x 5 1/4" piece of White Daisy Cardstock, from the top left corner to the bottom right corner. I used five 1/4" wide pieces of washi, for a total of a strip that is about 1 1/4" wide down the middle of the card (diagonally). If you have washi in other sizes, just put what you need to to total 1 1/4" wide. Trim off excess so it is flush with the edges of the White Daisy piece.
5. Adhere the stamped thank you strip to the card, 1 1/8" from the top of the card.
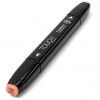
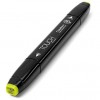
6. Using your Light Orange, Carmine, and Leaf Green Shin Han Markers, color and shade your stamped flower bunch. Cut them out, leaving a small border around them. Adhere this, using 3D Foam Tape, next to the stamped thank you on your 4" x 1" White Daisy Cardstock strip.
7. Adhere the 4" x 5 1/4" White Daisy Cardstock Piece to the 4 1/4" x 5 1/2" Black Cardstock piece, centered. Adhere this to the front of your card.
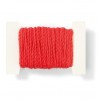
8. Adhere the 4" x 1" thank you White Daisy Cardstock strip to the 4" x 1 1/4" Black Cardstock strip, centered. Tie a piece of Poppy Twine around the left edge and using your Piercing Tool, fray the ends. Adhere this to the front of the card, centered from the left and right sides, and 1 1/8" from the top edge.
9. Add Bitty Sparkles to the center of each flower.
VOILA!
Happy shopping and happy card making!





No comments:
Post a Comment