I was honored to be asked to be a guest artist for the Atlantic Hearts Sketch Challenge this week. The sketch was clean, fun, and easy to work with. I decided to go with a longer, skinnier card and move my sentiment to the bottom, but other than that I followed the sketch almost exactly.
I've included a products used list complete with photos and links to each individual product on my website at the end of this post for your convenience. All products I've used on the card are from Close To My Heart. Here are a few details of my card:
- My card measures 4" x 8" finished. That means I started with an 8" x 8" piece of cardstock and folded it in half.
- I also decided to go with kind of a non-traditional color scheme; Canary, Glacier, Black and White Daisy with a touch of Cranberry.
- You'll also notice in the close up above that I did a little fussy cutting and popping up.
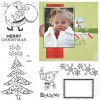
- I first stamped my tree from the stamp set on a 2 3/4" x 4 1/2" piece of White Daisy cardstock and then stamped it again on a scrap of White Daisy cardstock. Always use the Archival Black pad when you are planning to color in your images with alcohol markers) from the Christmas Cheer stamp set. I also suggest drying your image with a heat gun to make sure it is 100% dry before coloring. If you have plenty of time to let it dry on it's own, awesome. I'm just always so impatient to get started on my coloring. Patience is a virtue I have yet to master.
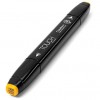
- I colored the tree I stamped on the scrap piece using Shin Han alcohol markers (these are the bomb.com, my peeps!). I didn't really do a lot of shading. Instead, I colored each area with the color I wanted then used the colorless blending marker to pic up and move color and make some parts lighter. I was happy with the effect!
- After coloring the tree, I cut out the star and each tree level piece separately and then used 3D Foam Tape to pop them up on the non-colored tree on the 2 3/4" x 4 1/2" piece of White Daisy Cardstock. I love that look!
- The tree trunk and pot were colored on the flat tree instead of also popping that piece. I tried popping it but decided I liked having that little piece flat better.
- I finished off the tree square by using my Marvy Uchida Journaling Pen and a trusty ruler to outline the square to give it a little bit more of a finished off look.
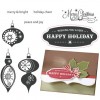
- I stamped the "Merry Christmas" sentiment from the Holiday Cheer Stamp Set near the bottom of the card.
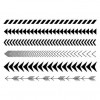
- I also stamped some arrows from the One Way Borders stamp set across the Canary Cardstock strip.
- I added some Bitty Sparkles to a few of the ornament spots on the tree pieces. Who doesn't love a little bling?
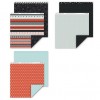
- The patterned papers on this card come from the gorgeous Snowhaven paper pack.








8 comments:
Karen - this card is just so gorgeous! You are amazing at what you do, and so inspiring!!
Adorable card! Love your color choices.
Ohmygorgeous! This is adorable Karen. You are so very talented!
Karen, this card is awesome- the colours are fabulous, the interpretation of the sketch is terrific and I am so glad that you are a guest artist with our design team this week! Thanks so much for joining us at Atlantic Hearts!
Your Christmas tree is gray. Gray! And I LOVE it!! I rarely think outside of the box on colors, but this just goes to show how limiting that is. Fabulous card. Love everything about it!!
I adore everything about this card!!!! Great job!!!!!
What a fabulous card! I love everything about it! I especially like that you changed up the sketch a bit and went with the tall & skinny card - great idea. So glad to have you with us this week at AHSC.
I love this card. The yellow-black combo with all the other non-traditional colors make this card so happy and bright. Thanks for sharing your talent with us at Atlantic Hearts.
Post a Comment