pin it button

Showing posts with label Autumn Papercrafting. Show all posts

Thursday, November 17, 2016

Thanksgiving Place Card with Instructions


Thanksgiving is coming soon...as in next week.  If you are hosting, in addition to getting organized with your shopping and menu, you are probably also trying to think of inexpensive ways to make your table beautiful.  I'm here to help!

This little place card came together in minutes.  Adding homemade place cards is a GREAT way to add personality to a table, while also making it beautiful and festive.


Want to create place cards like this one?  Here are the instructions (I've also listed all products used at the end of this post, complete with photos and links to my website for your convenience):
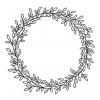
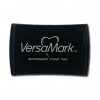
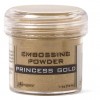
  1. Stamp a 3" x 3" piece of Colonial White Cardstock with your wreath (I used A1193-Wreath) in Versamark ink, sprinkle with gold embossing powder, shake off the extra powder, then heat emboss with your heat gun.
  2. Color in leaves with the Marigold and Carmine Shin Han Markers
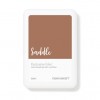
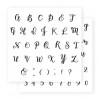
  3. On a strip of Colonial White Cardstock, using Saddle Ink and your favorite alphabet stamp set (I used E1035-Bistro Script), create a name, then dovetail each end and sponge edges with Saddle Ink.
  4. Cut a 3 1/2" x 7" piece of Colonial White Cardstock and fold in half for the place card base.
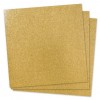
  5. Cut a 3 1/4" x 3 1/4" piece of Gold Glitter Paper. Using 3D thin foam tape, mount this on the front of your place card, centered.
  6. Also using 3D thin foam tape, mount your wreath on the gold glitter square, centered.
  7. Also using 3D thin foam tape, mount your name in the center of the wreath.
  8. Add a jute bow, and you're done!


Wednesday, October 14, 2015

Framed Halloween Layout


I love Close To My Heart's awesome Designed Decor Shadow Box Frame. It comes in Colonial White (shown above) and Black.  It holds one 12" x 12" layout, and has a magnetic closure so it's easy to open and close and switch out your layouts to display in your home.  In fact, it's even paintable.  Below is a photo of the layout above in the exact same frame that I spray painted with a sparkly green paint. Cool, right?


I created the layout with our new Nevermore papers and complements with a few more fun accents added. I have included a complete products used list, along with photos and links for your convenience, at the end of this post.  The Nevermore line is only available through December 31, or while supplies last, whichever comes first, so be sure to get yours asap!


Wednesday, November 5, 2014

My Pumpkins Layout with the November Stamp of the Month


This month's Stamp of the Month is a beautiful floral set called "It's the Little Things."  I was playing with it the other day and realized I had some pumpkin photos of my grandkids I wanted to scrap. I wondered if there was a way to use this set to create the layout.  I think you'll agree there was! I am pleased with the way this 1-page layout turned out.  Just by adding some Autumn colors in with the floral I felt the set was the perfect compliment to the photos. I used a few alphabet sets as well and I think the whole thing turned out beautifully.  Of course, the darling pics of the grandkids are the best part!

This set is available during November only and is yours for only $5 with each $50 you spend (before shipping and tax).  Spend $100, get 2, and so on.  You can place your order on my website 24/7...and you'll be prompted to add your Stamp of the Month set(s) before you check out.  I've also included a complete list of the products used on this layout, complete with photos and links for your convenience at the end of this post.

November Stamp of the Month:  It's the Little Things (carrier sheet actual size is 6" x 6")


LinkWithin

Related Posts with Thumbnails