pin it button

Showing posts with label Card Sketch. Show all posts

Monday, May 15, 2017

Love Card with Instructions and a Card Sketch


Do you have people you LOVE that would LOVE to receive a card like this? If your answer was, "Yes," then you're in luck because....

1.  This beautiful stamp set (Live, Love, Laugh) is available only in May, and can be yours for only $5 with every $50 you purchase (before shipping and tax).  Order $100, get 2...and so on.  When ordering on my website, you'll be prompted to add your set(s) before checking out.


2.  I have decided to include paper measurements for you, quick instructions, and a list of all of the products I used (see the very end of this post for that, complete with photos and links to each of those products).  I've even created a fun little sketch of it for you.  I'd love to hear from you with a photo of your card if you use the sketch.  It would be so much fun for me to see your creations!


  • Card size (4 1/4" x 5 1/2")
  • White Daisy Cardstock:  4" x 2 1/4", 1 1/2" x 1 1/2" (to stamp flower on), 4" x 1/2" (scalloped on one long side)
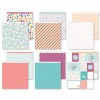
  • Blue Striped Piece:  4" x 2 1/2" (I used a piece of paper from the Little Dreamer Paper Packet)
  • Pink Heart Strip: 4" x 1/2"  (I actually used the zip strip from the top of the cloud paper in the Little Dreamer Paper Packet)
Instructions:
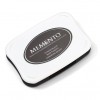
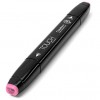
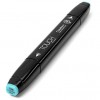
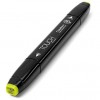
  • Using your Black Memento Pad, stamp "LOVE" on the 4" x 2 1/4" White Daisy Cardstock piece.   Then stamp the loopy flower on the 1 1/2" x 1 1/2" White Daisy Cardstock pice.   Let dry for a few minutes, then color in with Tender Pink, Turquoise Blue and Leaf Green Shin Han Markers.
  • Adhere "LOVE" piece 1/8" from bottom of card and equidistant from each side of the card.
  • Adhere Blue Striped Piece 1/8" from top of card and equadistant from each side of the card.
  • Using a scallop punch or scalloped scissors, scallop one long side of the 4" x 1/2" White Daisy piece.  Adhere this peeking out from underside of the 4" x 1/2" Pink Heart Strip. Adhere this to card at the top edge of the LOVE piece.
  • Cut out loopy flower (leaving a small white border) and, using 3D Foam Tape, adhere to the card along the Pink Heart Strip, about even with left side of card.
  • Add a small White Dot to the center of the loopy flower.

Enjoy the sketch!  Again, I'd love it if you contacted me with a photo of your creations if you use the sketch. I'd love to see what you come up with!




Wednesday, April 19, 2017

Cards with My Sketch

You may remember a couple of weeks ago I posted a card sketch I created and a card to go with it. You can see them here.  Also, here's a little photo of them both.


Well, in that post,  I invited people to use my sketch and share what they created. Two people, whose artwork I admire greatly, rose to the challenge.  I'm so excited to share!

First off, here's a card from my friend, Jaquie Paech, all the way from Australia! She's a CTMH Consultant and beautiful artist.  You should give her a follow at:  https://sweetpaperpassion.com/! Great job with the sketch, Jacquie!  Jacquie used the Hello Lovely Paper Packet, which retires at the end of April, so get it while you can right here.


Secondly is my friend, Laurel Seabrook. Laurel does such beautiful artwork and I always learn something new when I look at her designs.  She is a CTMH Consultant in Canada.  You can give her a follow at:  https://laurelseabrookdesigns.blogspot.com/.  Laurel used the GORGEOUS Live Beautifully Paper Packet (that will be available from CTMH only in May...so you are getting a sneak peek). Check back here on May 1 and you can see all of the May Live Beautifully products and find out how to get them.  They are TO. DIE. FOR!


Jacquie and Laurel, thanks for making my sketch look so good!


Monday, March 27, 2017

Teacup Card and a Card Sketch


Are you always looking for ways to use up paper scraps? Well, this card is the perfect solution!  I'll even give you the exact measurements of everything on this card so you can use the pattern to create one of your own, but first...let's talk about that darling stamp set!

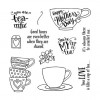
It's called Tea-rrific, and it's the March Stamp of the Month. With today being March 27, that means you only have 5 more days (Friday is the last day of March) to get this baby.  It's yours for only $5 ($12.95 savings) with every $50 you purchase (before shipping and tax).  Order $100, get 2...and so on. When ordering on my website, you'll be prompted to add your set(s) before checking out.  Tea-rrific!


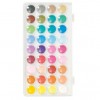
I stamped my teacup and sentiment in our Memento Black Pad. I love this pad for anything I'm going to be coloring in, whether with markers, pencils, watercolor paints (which I used on this card), or any other medium, because once it's dry, it really doesn't smear. That's important!


Now let's move on to the card measurements.  I thought I'd get a little fancy today and create a sketch.  How 'bout them apples?  I'm pretty proud of myself!  In addition to the sketch below, I've also listed all of the products I used, complete with photos and links, at the very end of this post.


Happy card making!  If you make something using my sketch, I'd love to see it!  You can email it to me at pedermom@aol.com.  If you do (and you live in the United States), I'll even send you a hand stamped card (please be sure to give me your mailing address in the email). Also, I might just even post some of the card photos you send me made with this sketch.  Be sure to email me the photo of your card no later than March 31 (Friday).


LinkWithin

Related Posts with Thumbnails