It's a new year and a new month, and with them come some awesome specials with Close To My Heart.
Here's what's happening in January:
1. Welcome Home Wreath Special (get it 4 ways, 3 of which are FREE!)
2. Brand new Expressions I 2017 Mini-Catalog
3. January Stamp of the Month
--------------------------
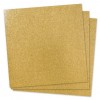
1. Welcome Home Wreath Special: This beautiful wreath kit comes pre-cut with step-by-step instructions.
The kit includes:
- 12" thick and sturdy chipboard wreath base (finished wreath will measure approximately 15")
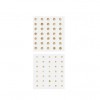
- gold foil alphabet stickers
- all shapes die cut (including flowers, leaves and more)
- step-by-step instructions
There are 4 ways to get it (and 3 of them are FREE!):
- Order $60 (before shipping and tax) and it's FREE!
- Host a Close To My Heart Gathering and when your sales total $250 or more (before shipping and tax), you get it FREE! $250 is so easy to reach!
- Sign up as a Close To My Heart Consultant (costs $75 and you get over $200 in products) and in January, this wreath kit will be added to your New Consultant Kit for FREE!
- Order it for $18.95.
Wondering what you need to complete the kit? Only a
Quilling Tool and some
Liquid Glass. This kit is so easy to put together that even a beginner can do it!
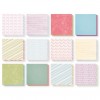
2. Brand New Expressions I Mini-Catalog: This new catalog went live yesterday (January 1) and goes through April 30. Want one? Well, all you have to do is place an order on
my website and you'll be prompted to add one for FREE before you check out. You can view it page-by-delicious-page right
here. It's full of beautiful spring papers, stamps, die cuts, embellishments, soft colored 12" x 12" albums (in both post-bound and D-ring styles), scrapbooking kits, card kits, beautiful artwork and ideas, and so much more!
3. January Stamp of the Month (Adore You): This set features 7 beautiful sentiments, in different sizes and elegant fonts, 4 different image designs, and is perfect for Valentines, wedding cards, thank you's and all-occasion cards, as well as scrapbook pages. I'll be sharing ideas every week with this set, so be sure to keep stopping by throughout the month.
This set is yours for only $5 ($12.95 savings) in January only with every $50 you order (before shipping and tax). Order $100, get 2...and so on. When ordering on
my website, you'll be prompted to add your set(s) before checking out. Easy, peasy!
The card you see at the top of the post is one I made using this set. It could be used for a Valentine, wedding, or even a baby card. How's that for versatile? I've included a list of the products I've used, complete with images and links at the very bottom of this post. Below the photo below, I've included step-by-step instructions.
Step by Step Card Instructions:
Paper needed: 4 1/4" x 5 1/2" White Card Base, 4" x 1 1/2" White Daisy Cardstock Strip, (2) 4" x 1/2" strips of Gold Glitter Cardstock, 4" x 2 3/4" piece of diagonal striped B&T paper of your choice (I used the diagonal strip from the Whimsy Fundamentals Paper Pack), 4" x 1" strip of B&T paper of your choice
1. Stamp the 4" x 1 1/2" White Daisy Cardstock with solid floral heart. First stamp the Pixie heart, then the three Seaglass hearts. Set aside to dry before embossing XO.
2. Adhere 4" x 1" piece of B&T to top of card, 1/8" from top and sides.
3. Adhere the 4" x 2 3/4" piece of B&T to bottom of card, 1/8" from top and sides.
4. Using a pair of scalloped scissors or a scalloped punch, scallop the two Gold Glitter Cardstock strips. Adhere these to the back edges of the 4" x 1 1/2" heart stamped strip, with the scallops peeking out when you look at it from the front.
5. Using Versamark pad, stamp the "xo" stamp onto the Pixie Heart, then sprinkle on Gold Embossing Powder and shake off extra. Heat with heat gun until it is embossed. Hint: I use a small paint brush to brush off any unwanted embossing powder from my project before heating.
6. Adhere this to the front of the card, approximately 1" from top edge.
7. Finish off by adding 2 small Gold Glitter Gems to the bottom right corner
8. Add a sentiment inside the card if desired.