pin it button

Showing posts with label Baby Card. Show all posts

Tuesday, May 31, 2016

Last Day for May Specials!

3" x 3" baby gift enclosure card made with the May Stamp of the Month


Today is it...the last day to take advantage of the amazing May specials.  Let's review them quickly, so you can hop on over to my website and get yours.  These offers end at 11:59 pm (Mountain Time) tonight, so hop quickly!

1.  National Scrapbooking Month Exclusive Paper Packet and Matching Stamp Set (Happy Times)
2.  25% all Albums
3.  May Stamp of the Month

------------

1.  National Scrapbooking Month Exclusive Paper Packet and Matching Stamp Set (Happy Times):  Happy Times for sure!  Because May is National Scrapbooking Month, and because we are a company that celebrates relationships through the art of scrapbooking, we are on board in a BIG way.


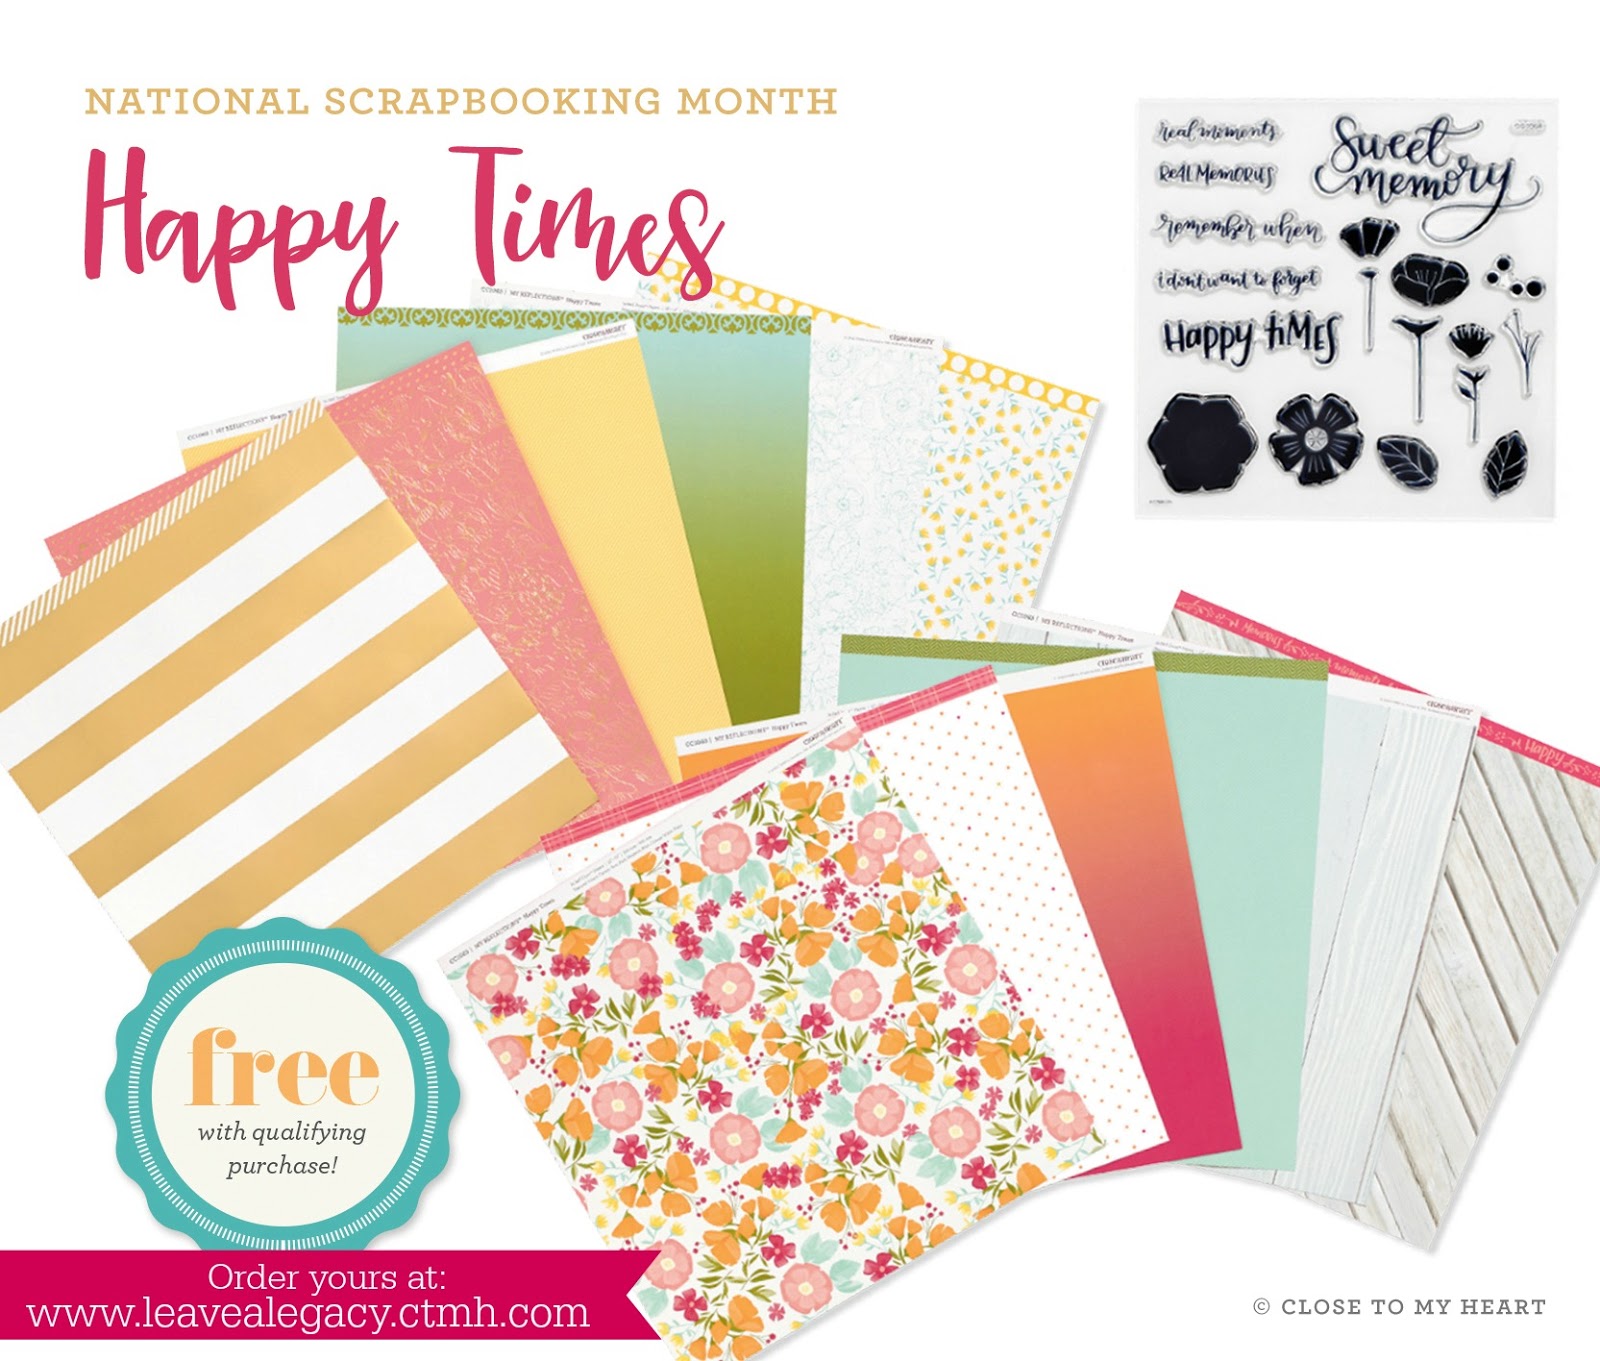
Happy times can be yours only during the month of May because we’re offering an exciting promotion to celebrate National Scrapbooking Month! With a qualifying purchase of $60, you can get the exclusive Happy Times paper packet for FREE (when ordering on my website, you'll be prompted to add your free paper packet(s) before checking out! This fun paper packet, which is available for one month only, features floral designs, gold foil details, and more! You can also purchase this exclusive paper packet at full retail for $14.95 with no purchase requirement. Additionally, we’ve designed a coordinating D-size stamp set, My Acrylix® Happy Times, to go with the paper packet, which you can purchase for $17.95. There’s never been a better time to treat yourself to some beautiful new paper!

Happy Times Paper Packet - yes, that's real gold foil on several of the papers. Divine!

Happy Times Stamp Set


2.  25% all Albums: We carry post bound and D-ring albums.  To go with National Stamping Month AND Happy Times, we are discounting all in-stock albums 25%. Since our quality albums are usually $34.95, that means that during May (and only while supplies last), they are $26.21!  Not too shabby, peeps! You can see the albums available today below (and here's the link):


3.  May Stamp of the Month (Celebrate with Cake):  Did you see that little gift enclosure 3" x 3" card at the top of the post?  I used the May Stamp of the Month to create it


I think this stamp set is so much fun, and today is the last day to get it.


For every $50 you order in May (before shipping and tax), you get this stamp set for $5 ($12.95 savings).  Spend $100, get 2...and so on.  When ordering on my website, you'll be prompted to add your set(s) before checking out.

 
WOW! How's that for an amazing bunch of May specials? Don't forget that TODAY is the LAST day to get them!


Monday, May 16, 2016

Celebrate Card


Remember last Monday when I showed you a fun way to use the May Stamp of the Month on a layout, and it was kind of 'out of the box' thinking?  I didn't use any of the stamps to make a cake or to celebrate a wedding or birthday.  Instead, I used the "Celebrate" stamp and rose stamps to celebrate an accomplishment of our daughter. You can see that post here.

In that post, I promised that today I would share another "out of the box" card with this stamp set. I thought the square cake layer would make a cool background, so I went to work to find out. This is what I came up with, and I really like it! It's a great card for birthday, new baby, graduation, anniversary, wedding, and so many other things (pretty much anything you celebrate!).

To create this card:  On watercolor paper, I stamped the blocks in the background with my trusty Black Memento Pad, then, after letting it dry for about 10 minutes, painted using my watercolor paints.  The bottom panel is also watercolor paper, and I did a quick green watercolor wash, then after it dried, I stamped the "Celebrate" sentiment. If you are wanting to duplicate this card, or use the basic design, for your convenience, the top panel is 4" x 4" and the bottom is 1 1/4" x 4".  The card itself is a standard card (4 1/4" x 5 1/2" folded).  Also, all the products I used are listed at the very end of this post, complete with photos and links.


This stamp set is only available in May, and is yours for only $5 ($12.95 savings) with every $50 you order (before shipping and tax).  Order $100, get 2...and so on.  When ordering on my website, you'll be prompted to add your set(s) before checking out. Easy, peasy!


Friday, March 4, 2016

Watercolor Baby Cards with Step By Step Instructions


Before we talk about these yummy cards, let's remind ourselves that tomorrow is the last day of my Cruise Special.  Be sure to check out the last post for all the details.

NOW, let's talk about the cards.  I had fun creating these with my Cricut and the stamp set that comes in the Georgie Scrapbooking Workshop on the Go. Not only does this workshop give you beautiful scrapbook pages, but it comes with this awesome stamp set that is perfect for so many baby projects.

I love the sentiments of Hello, Baby, Little One, Welcome, Sweet, and all of the image stamps for baby cards.  Every single image is perfect for scrapbooking too. When you purchase this workshop for only $29.95, you get everything you see here, instructions for gorgeous scrapbook pages, plus a stamp set that will last forever for baby cards!

Here is the layout I made with this workshop:
 And, by adding a few extra sheets of cardstock, I also made these:


Now, let's go back to those baby cards...


Don't you just love that ombre watercolor look?  Would you like instructions on how I made this card?  Well, then I think I'll give them to you!  Be sure to check out the products used list, complete with photos and links to those products on my website for your convenience, after my signature at the end of this post.

1.  This is a 6" x 6" card. So, you'll need a 6" x 12" piece of White Daisy Cardstock, then score at 6" and fold in half.
2.  From a piece of White Daisy Cardstock, cut the Chevron overlay from the CTMH Artbooking Cricut Cartridge at 5".  Cut the oval on page 25 of the CTMH Artistry Cricut Cartridge at 2 1/4".
3.  Cut the oval on page 25 of the CTMH Artistry Cricut Cartridge at 2" from Watercolor Paper.
4.  Using a Versamark Pad, White Embossing Powder, and your Heat Gun, emboss the "Little One" image from the Georgie Workshop on the Go Stamp Set on your 2" Watercolor Paper oval.   {Not sure how to heat emboss?  First stamp your image with Versamark Ink. Sprinkle White Embossing Powder on top and then shake off the extra onto a sheet of paper so you can pour it back into the jar.  Finally, heat your image with the heat gun (kind of waving the gun until the powder melts and embosses. Don't hold your gun in one spot or it can scorch your paper).  Voila!}.
5.  Using Watercolor Paints and Watercolor Paint Brushes, as well as water, paint over the "Little One" oval by starting at one edge and painting back and forth to the top.  You can go back and add a bit more paint until you get the desired effect.  You will want it to gradually get lighter as you work your way.  Once you have painted, carefully take a q-tip and remove any paint that may be adhering to the white embossing.
6. Cut a piece of 5" x 5" Watercolor Paper and do the same to this square as you did to the "Little One" oval.
7.  Let watercolor pieces dry about 5-10 minutes.
8.  Adhere the Chevron overlay on top of the 5" x 5" Watercolored Paper.  Attach this to the front of the card, centered. I chose a top fold card so that I could tie a ribbon all the way around the card.
9.  Tie a ribbon around card, into a knot, leaving 1 1/2" tails.
10.  Adhere the "Little One" oval to the larger White Daisy Cardstock oval.
11. Using 3D Foam Tape, adhere this to the front of the card.
12.  Lastly, add some fun blue or pink accents. I used Flamingo Dots on the pink card and Blue Dots on the blue card.

There you go! You're set! I hope you enjoyed that little tutorial and that you have tons of fun creating your own baby cards!


LinkWithin

Related Posts with Thumbnails