pin it button

Showing posts with label Technique Instructions. Show all posts

Monday, June 5, 2017

Fox Layout and Six Artwork Tips


Sometimes you just have that perfect photo, one that stands alone and demands it's very own layout. This is one of those pics! I love one-page layouts for just this kind of perfect photos.  Our little granddaughter, Sage has done quite a bit of modeling for online catalogs and websites, but this was her very first magazine spread. Daysha (our sweet daughter-in-law, and Sage's mommy) caught the excitement of her seeing it for the first time.  I LOVE, LOVE, LOVE the look on her face!

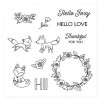
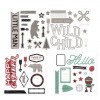
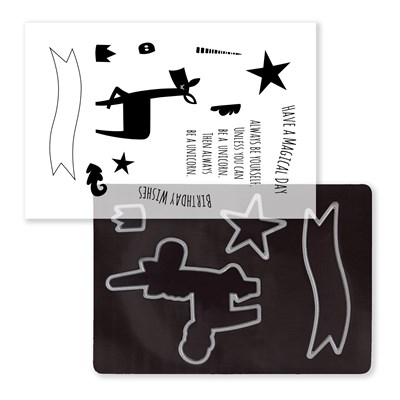
I used the June Stamp of the Month (Hello Foxy) to create this layout. This stamp set is only available in June, and is only $5 ($12.95 savings) with each $50 you purchase (before shipping and tax).  Order $100, get 2...and so on!  When ordering on my website, you'll be prompted to add your set(s) before checking out.  I've shared some of the tips to create this layout below, as well as adding a complete list of all of the products I've used, complete with photos and links for your convenience, at the very end of this post.


Layout Tips:

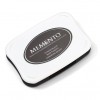
  • I stamped everything with my Black Memento Pad, let it dry for a couple of minutes, then used my trusty Watercolor Paints to color and shade.  I LOVE the Black Memento Pad!  Once it's dry, there is no smudging when watercoloring, coloring with markers, or even colored pencils. This pad is a must have!
  • When teaching watercoloring, the first tip I give my students is: LESS IS MORE!  If you want that soft look, use less color and more water in your mix. As it dries, it darkens a bit. The more paint there is in your mix, the chalkier it will look.  The more water, the softer it will appear.
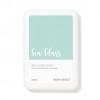
  • The only other stamp pad I used was our gorgeous Sea Glass Pad. I stamped some flowers in the top strip of the layout to create my own patterned paper.  
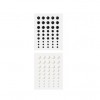
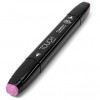
  • See those fun enamel dots that match the Thistle Cardstock so well?  I just used my Peony Purple Shin Han Alcohol Marker to color some White Dots. Color them right on the carrier sheet they come on and that way you can get right down to the bottom edges without the color getting on anything else.  Let them dry for about 2-3 minutes, then take them off the carrier sheet and you have your own customer colored accents to add to your project.  
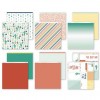
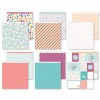
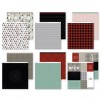
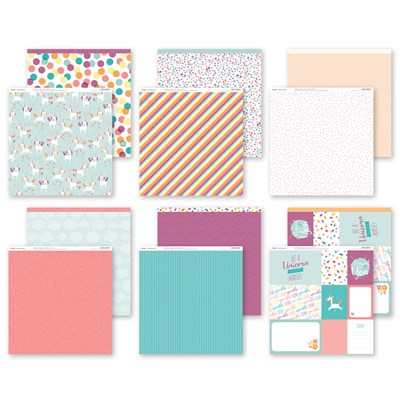
  • Do you ever purchase a paper packet and then have some odds and ends left over after you've created whatever it is you bought it to create? Well, I certainly do!  I used a strip of left over paper from the Prickly Pear Paper Packet (the pretty striped Sea Glass paper that goes horizontally across the middle of the layout), one of the Picture My Life cards (the orange diagonal striped one) that I had left over from Prickly Pear,  and one of my left over zip strips (the polka dotted orange one) from the Hello Dreamer Paper Packet.    I thought they went nicely together on this layout.  Don't be afraid to mix paper packets!  You'll come up with some fun combinations, and at the same time, use some of that left over paper!  Win/Win!
  • The "Notes" card that I used for my journaling was a bit bigger than I needed (4" x 3"). I wrote my journaling, then trimmed the unused portion of the card off (my finished journaling square was 4" x 2"), and rounded the bottom corners to match the top. Easy, peasy! Don't be afraid to think outside the box and make things work for your needs.


Monday, May 8, 2017

Masculine Layout with the May Stamp of the Month


When I saw the May Stamp of the Month, I immediately thought of this awesome picture of our son, Dawson laughing.  The only thing is, the letters in the May Stamp of the Month are filled with flowers.  That's a GOOD thing in most cases, but not this one. I wanted the "LAUGH" letters, but not with the flowers inside for this layout.  So, since necessity is the mother of invention, I decided to pull out my Black Shin Han Marker and color in the letters once I stamped them. I then used my Gold Metallic Marker to add polka dots, then added an outline with my Journaling Pen.  VOILA!  Floral "LAUGH" is now polka dotted "LAUGH," and is now perfect for this layout.  I used papers from our brand new Jack Paper Packet (LOVE!!!!) and the matching Jack Complements as my accents.  I have included a list of all of the products I used on this layout, complete with photos and links for your convenience, at the end of this post.


I'll  share a few more details about this layout in just a jiffy, but first I wanted to be sure you knew how to get this awesome stamp set.  It's yours in May only for $5 ($12.95 savings) with each $50 in product you purchase (before shipping and tax).  Order $100, get 2...and so on. When ordering on my website, you'll be prompted to add your set(s) before checking out.  Easy, peasy!


Now, here are a few details of the layout:


Friday, May 5, 2017

Unicorn Card, Cutting Instructions and Technique Tip


One of my favorite lines of products from our brand new mini-catalog (Expressions 2) is the Little Dreamer collection.  There is a paper packet, complements (embellishment pack), a scrapbooking workshop, and coordinating stamp sets and die cuts.  Oh my!

I created this fun little card using the Little Dreamer Paper Packet, one of the darling coordinating stamp sets, and a few versatile embellishments.  I've added a complete list of the products I used on this card at the very end of this post, complete with links and photos for your convenience.

Not only is this card cute and really quick to make, I am so in love with the sentiment stamp, aren't you?  Unicorns are all the rage right now, and not just for little girls. We big girls seem to have gotten into the action too.  Who wouldn't love to receive this card?

Here are the paper measurements for this card so that you can easily make it yourself:


White Daisy Card Base:  just purchase a package of our bulk White Daisy Standard Cards and Envelopes, or if you prefer to cut your own card bases, you'll need a 8.5" x 5.5" piece of white cardstock, folded in half.  In addition...
  • White Daisy Cardstock (sentiment piece): 2" x 2 1/4"
  • Unicorn Background and Texture Paper: 2 3/4" x 5 1/2"
  • Multi-Colored Dots Background and Texture Paper: 2 1/4" x 2 1/2"
  • Thistle Colored Zip Strip (or 1/2" strip of Background and Texture Paper): 1/2" x 5 1/2"

Technique Tip: To fray the twine like I did on my card, just take your piercing tool (or even a straight pin) and separate the fibers so that your look is frayed. Easy and cute!
Look at these fun Little Dreamer products. This is just a sampling. To see them all, click here.

product image
Little Dreamer Paper Packet
product image
Little Dreamer Coordinating Embellishments (Complements)
product image
Little Dreamer Cardmaking Stamp Set and Coordinating Thin Cuts


You can stop by my website at any time to purchase these and all of the other amazing new products that came out this week.  Enjoy!  By the way, if you make a purchase on my website, you'll have an option to get the brand new Expressions 2 catalog included in your order ABSOLUTELY FREE.  Just click the box when it comes up at the end of your order.


LinkWithin

Related Posts with Thumbnails