Showing posts with label Thanksgiving Cards. Show all posts
Thursday, November 24, 2016
Happy Thanksgiving and Black Friday Sale
Happy Thanksgiving! I hope you are enjoying family, great food, a little football, and feelings of gratitude. I sure am! I want you all, my blog readers, to know that I am very grateful for you and your support of my business, and indulging me as I share my creations. I am so blessed to have you in my life! This little blog is a joy to me to write and share my art, as well as a little about my family and me. I'm glad there is someone out there who reads it! đ
Don't forget that TOMORROW, Friday, November 25, from 12 am - 11:59 pm (MDT) there is a GREAT Black Friday sale on my website.
You may have a few questions about these secret stash boxes. Maybe I can answer them for you.
What is included in the mystery boxes?
It’s a big surprise, but we will tell you that the mystery boxes will be filled with retired products grouped together purposefully for certain types of crafters.
The scrapbooking bundles will contain products like retired My Legacy™ albums, papers, Complements, Instalife™ mini albums and cards, Picture My Life™ pocket scrapbooking cards, and assorted embellishments like mini-medley accents, washi tape, and stickers!
The cardmaking bundles will contain things like retired Cut Above™ card kits, envelopes in assorted sizes, papers, and assorted embellishments.
Finally, we will also be offering scrapbooking & cardmaking bundles with a combination of products for those who love it all! Again, these bundles will be inside mystery boxes, so you won’t know which exact products you’ll be getting, but this gives you an idea of what we’ve cooked up.
What are the prices for the mystery boxes?
$35 mystery boxes (on average, a $70 value!)
$50 mystery boxes (on average, a $90 value!)
$75 mystery boxes (on average, a $140 value!)
$115 mystery boxes (on average, a $235 value!)
$150 mystery boxes (on average, a $335 value!)
That's good stuff! Get your secret stash tomorrow!
Thursday, November 17, 2016
Thanksgiving Place Card with Instructions
Thanksgiving is coming soon...as in next week. If you are hosting, in addition to getting organized with your shopping and menu, you are probably also trying to think of inexpensive ways to make your table beautiful. I'm here to help!
This little place card came together in minutes. Adding homemade place cards is a GREAT way to add personality to a table, while also making it beautiful and festive.
Want to create place cards like this one? Here are the instructions (I've also listed all products used at the end of this post, complete with photos and links to my website for your convenience):
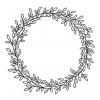
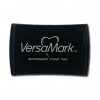
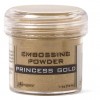
- Stamp a 3" x 3" piece of Colonial White Cardstock with your wreath (I used A1193-Wreath) in Versamark ink, sprinkle with gold embossing powder, shake off the extra powder, then heat emboss with your heat gun.
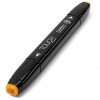
- Color in leaves with the Marigold and Carmine Shin Han Markers
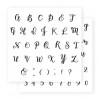
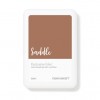
- On a strip of Colonial White Cardstock, using Saddle Ink and your favorite alphabet stamp set (I used E1035-Bistro Script), create a name, then dovetail each end and sponge edges with Saddle Ink.
- Cut a 3 1/2" x 7" piece of Colonial White Cardstock and fold in half for the place card base.
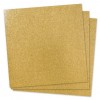
- Cut a 3 1/4" x 3 1/4" piece of Gold Glitter Paper. Using 3D thin foam tape, mount this on the front of your place card, centered.
- Also using 3D thin foam tape, mount your wreath on the gold glitter square, centered.
- Also using 3D thin foam tape, mount your name in the center of the wreath.
- Add a jute bow, and you're done!
Monday, September 12, 2016
Blessed Card and Artwork Tips
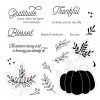
I created this 5" x 7" beauty with the September Stamp of the Month (Blessed Beyond Measure). This stamp set is only available in September, and is yours for only $5 ($12.95 savings) with every $50 you order (before shipping and tax). Order $100, get 2...and so on. When ordering on my website, you'll be prompted to add your set(s) before checking out.
I had fun shading my pumpkin with watercolor pencils (using no water). I shared a few tips on coloring with pencils on top of a solid stamped image a little earlier this month, but I'll just post them again as a quick reminder, as well as a few more artwork tips from this card. I've included a products used list, complete with photos and links for your convenience, at the very end of this post.
Shading on Top of a Solid Stamped Image with Colored Pencils Tips:
- You can use regular colored pencils or watercolor pencils. I love using watercolor pencils both with and without water. They are smooth and soft!
- After stamping your image, find a color that is just darker than your image. Scribble with that pencil on a scratch sheet of paper to make an angled tip and use that flat edge to color with (never use the point or you'll see pencil lines).
- When coloring, go with the shape of the area you are shading. I shaded each section of the pumpkin separately, so I went back and forth like a crescent moon in my shading.
- Push hardest with your pencil where you want the darkest color, then ease up on the pressure as you move in and want your shading to be less and less.
- You can continue to add darker colors in the areas you want to be the darkest. I stamped my pumpkin with Goldrush ink, then used 2 colors, orangish and brownish pencils, from our watercolor pencils set to shade.
- The bottom cardstock panel on this card is Pomegranate Cardstock. I stamped a tone-on-tone pattern using one of the branch stamps from the set in Pomegranate ink. Creating your own patterned paper is a fun thing to do! Be sure to space your stamps pretty evenly, change direction of your stamp, and don't be afraid to stamp off the edges.
- The word blessed is embossed in gold powder. Be sure when you emboss over a pattern that you have stamped you either make sure your pattern is 100% dry before you add your embossing powder (or it will stick to those cut branches too), or have a tiny paint brush to brush off any powder that wants to stick where it's not supposed to before heating your embossed image.
Subscribe to:
Posts (Atom)