pin it button

Showing posts with label Embossing Folders. Show all posts

Tuesday, August 9, 2016

Love Card with Fundamentals Paper and More


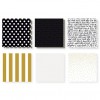
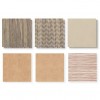
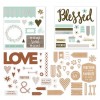
This quick, easy 5" x 7" card is a great way to say, "I love you" to someone special.  I have mixed the Uptown Basics Fundamental Paper Pack and the Rustic Home Fundamental Paper Pack  with a few cardstocks from our Enchantment collection (Poppy and Peacock, sanded lightly). In addition, I've added some of the All Together Complements and used the new Simple Chevron Embossing Folder, the Love Thin Cuts and the Heart Thin Cuts.  All together it made a great card {in my humble opinion....;) }. There are just so many awesome products in the new 2016-17 Catalog that debuted on August 1 that I find it difficult not to use them all at once. You can shop for these and so many products on my website.


I've included a list of all the products I used on this card, as well as photos and links for your convenience, at the end of this post.

Don't forget that August is the Basically the Best special, where if you buy one each of the new Whimsy, Adventure and Enchantment Fundamental Paper Packs, you get your choice of the Rustic Home or Uptown Fundamental Paper Packs for free. You can do that in one easy little click right here.


Monday, November 9, 2015

Happy New Year Card with Watercolor Wash Technique Instructions


The November Stamp of the Month is great for documenting goals for 2016, as well as wishing someone you love a Happy New Year.  I created this standard size (4 1/4" x 5 1/2") card with our wonderful watercolor paints and paper.  I just love watercoloring! And, using your watercolors as a wash behind an embossed image is a GREAT way to begin, if you've never really watercolored before. I will give step-by-step instructions below on how I achieved this look, but first let me remind you about how to get this darling stamp set for only $5.

November Stamp of the Month - Cheers, 2016! (carrier sheet size is approximately 6" x 6")

This set (Cheers, 2016!) is only available during November, and is yours for only $5 ($12.95 savings) with every $50 you order (before shipping and tax). Order $100, get 2...and so on. When ordering on my website, you'll be prompted to add your set(s) before you check out. Easy, peasy!

Now, back to the instructions for the Color Wash Watercolor technique:


  1. Be sure to use our watercolor paper. This makes a huge difference in how smoothly the color goes on!
  2. Emboss what you want on the paper first. I used a black pigment pad and clear embossing powder for my black images. 
  3. Use the largest of our watercolor brushes and some water and "paint" the whole piece of the paper you will be washing lightly with water.
  4. Next choose what color of paint you want to work with. As you can see,  I used three different colors: a purple, blue and coral.  I started with the purple.  Wet your brush and pick up your purple paint.  Start at the bottom of the paper and work your way up by going back and forth with the color.  As you move upward, your color will lighten. Be sure the area you start in is where you want the most color. This way you will get more of an ombre feel. You can always go back and add a bit more color if you want a more dramatic look.
  5. I then did the same with my coral color at the top of the paper.
  6. Lastly, I filled in the middle with a hint of blue.
Voila!  Easy, peasy, lemon squeezy...and oh-so-cute!  I've included links below for each of the products I used.


Monday, January 12, 2015

Shaped Valentine Card and Instructions


This little gem took minutes to make!  I used the January Stamp of the Month set on this card.  I love this perfect little set. It can be yours for only $5 ($12.95 savings) for every $50 you spend (before shipping and tax).  Spend $100 and you qualify for 2, and so on.  When ordering on my website, you'll be prompted to add your set(s) before you check out.


I love that adding texture and dimension (and lots of visual interest) to cardstock is so quick and easy using our embossing folders.   I chose our Arrow Embossing Folder for this background of this card.  Here's how I made this card:


1.  Cut out the bracket card using the Art Philosophy cartridge at 4" on White Daisy Cardstock
2.  Cut out the bracket shape using the Art Philosophy cartridge at 3 3/4" on Glacier Cardstock
3.  Ran the Glacier CS bracket shape through my Cuttlebug using our Arrow Embossing Folder
4.  Adhered Glacier CS bracket shape to front of card
5.  Cut a 3/4" x 4 1/4" piece of White Daisy CS.
6.  Using Black Ink, I stamped the XOXO stamp from the January Stamp of the Month (This Moment) across this piece
7.  Using my black journaling pen and a ruler, I drew a border line across the top and bottom of this piece
8.  Adhered this strip near the bottom of the card and then trimmed the side edges to match the card
9.  On a 2" x 2" scrap of White Daisy CS, I stamped the 'love this' heart from the January Stamp of the Month.  I did it using the rolling technique. I first inked the stamp with my Pixie Pad, then before stamping I rolled the edges of this stamp in my Cranberry Pad.
10.  Using my black journaling pen I outlined the 'love this' sentiment on the heart as well as the outside of the heart.
11.  Cut out the heart, leaving a very thin white border around it.
12.  Mounted the heart on the card using 3D Foam Tape.

That's it! Easy peasy and oh, so cute! All supplies used are listed, along with photos and links for your convenience, at the end of this post.


LinkWithin

Related Posts with Thumbnails