

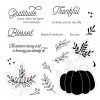
I created this 5" x 7" beauty with the September Stamp of the Month (Blessed Beyond Measure). This stamp set is only available in September, and is yours for only $5 ($12.95 savings) with every $50 you order (before shipping and tax). Order $100, get 2...and so on. When ordering on my website, you'll be prompted to add your set(s) before checking out.

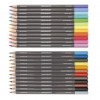
I had fun shading my pumpkin with watercolor pencils (using no water). I shared a few tips on coloring with pencils on top of a solid stamped image a little earlier this month, but I'll just post them again as a quick reminder, as well as a few more artwork tips from this card. I've included a products used list, complete with photos and links for your convenience, at the very end of this post.
Shading on Top of a Solid Stamped Image with Colored Pencils Tips:
- You can use regular colored pencils or watercolor pencils. I love using watercolor pencils both with and without water. They are smooth and soft!
- After stamping your image, find a color that is just darker than your image. Scribble with that pencil on a scratch sheet of paper to make an angled tip and use that flat edge to color with (never use the point or you'll see pencil lines).
- When coloring, go with the shape of the area you are shading. I shaded each section of the pumpkin separately, so I went back and forth like a crescent moon in my shading.
- Push hardest with your pencil where you want the darkest color, then ease up on the pressure as you move in and want your shading to be less and less.
- You can continue to add darker colors in the areas you want to be the darkest. I stamped my pumpkin with Goldrush ink, then used 2 colors, orangish and brownish pencils, from our watercolor pencils set to shade.
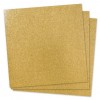
- The bottom cardstock panel on this card is Pomegranate Cardstock. I stamped a tone-on-tone pattern using one of the branch stamps from the set in Pomegranate ink. Creating your own patterned paper is a fun thing to do! Be sure to space your stamps pretty evenly, change direction of your stamp, and don't be afraid to stamp off the edges.
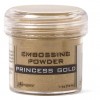
- The word blessed is embossed in gold powder. Be sure when you emboss over a pattern that you have stamped you either make sure your pattern is 100% dry before you add your embossing powder (or it will stick to those cut branches too), or have a tiny paint brush to brush off any powder that wants to stick where it's not supposed to before heating your embossed image.


2 comments:
So pretty Karen!
Gorgeous card!!
Post a Comment