

Thanksgiving is coming soon...as in next week. If you are hosting, in addition to getting organized with your shopping and menu, you are probably also trying to think of inexpensive ways to make your table beautiful. I'm here to help!
This little place card came together in minutes. Adding homemade place cards is a GREAT way to add personality to a table, while also making it beautiful and festive.

Want to create place cards like this one? Here are the instructions (I've also listed all products used at the end of this post, complete with photos and links to my website for your convenience):
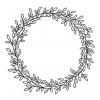
- Stamp a 3" x 3" piece of Colonial White Cardstock with your wreath (I used A1193-Wreath) in Versamark ink, sprinkle with gold embossing powder, shake off the extra powder, then heat emboss with your heat gun.
- Color in leaves with the Marigold and Carmine Shin Han Markers
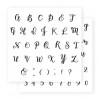
- On a strip of Colonial White Cardstock, using Saddle Ink and your favorite alphabet stamp set (I used E1035-Bistro Script), create a name, then dovetail each end and sponge edges with Saddle Ink.
- Cut a 3 1/2" x 7" piece of Colonial White Cardstock and fold in half for the place card base.
- Cut a 3 1/4" x 3 1/4" piece of Gold Glitter Paper. Using 3D thin foam tape, mount this on the front of your place card, centered.
- Also using 3D thin foam tape, mount your wreath on the gold glitter square, centered.
- Also using 3D thin foam tape, mount your name in the center of the wreath.
- Add a jute bow, and you're done!


1 comment:
Love this!
Post a Comment