

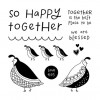
When I saw the darling April Stamp of the Month (Flock Together) I knew it would be perfect for a family layout. This is our daughter, Kori and her beautiful family.
I have some fun technique tips to share that I used on this layout, but first I want to remind you how you can get this stamp set. It's only available in April and is yours for only $5 ($12.95 savings) with every $50 you purchase (before shipping and tax). Purchase $100, get 2...and so on. When shopping on my website, you'll be prompted to add your set(s) before checking out.


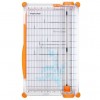
- Technique Tip #1: Do you love the look of a large scalloped square under the focal point of a layout (see top left and bottom right photos in the photo collage above)? I do! But, I don't always love lugging my Cricut out to cut one, nor do I want to search the local craft store to find a pre-cut one. I have the perfect solution....a CIRCLE PUNCH! WOO HOO! I used the 1" circle punch from Close To My Heart to punch White Daisy Cardstock circles then adhered them under that focal point square with about 1/2 of them hiding underneath so that you just see the scallops poking out. Easy, peasy and so cute!
- Technique Tip #2: I really wanted a touch of red on this layout. I added a few hearts stamped in Cranberry ink, but I wanted a red border too. I didn't want to add any more bulk to my layout, so instead of adding another layer of cardstock, I drew a double border with a ruler and journaling pen, then filled that in with my Shin Han Carmine Alcohol Marker. You can see this in the top right photo.
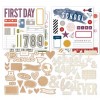
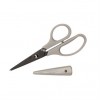
- Technique Tip #3: One of my very favorite looks is White Embossing on colored cardstock. I think it's such a beautiful look, easy to do, but one we forget about. I used this technique on the title. I just embossed the words in white on Peacock Cardstock, dovetailed the ends, and my title was ready! Fun! BONUS TIP: Did you notice that I stamped the title with the words all in a row, instead of stacked like you see it in the photo of the stamp set? That's easy to do! Just take your scissors and carefully cut the words apart. Then you can put them onto your stamp black however you choose...all lined up, or stacked. Cool beans!
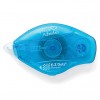
- Technique Tip #4: Pop it! I used two different thicknesses of 3D Foam Tape on this layout, the regular and the thin. I love the dimension popping a few things gives a card or layout, and by using a few different thicknesses, you can add even more dimension. I used Thin 3D Foam Tape under the title strip, and Regular 3D Foam Tape under some of the quail and hearts.
- Technique Tip #5: Don't forget that adding a little shimmer can be just the perfect touch. I used my handy dandy Clear Shimmer Brush to add some shimmer to each of the quail and to each of the Cranberry stamped hearts (see top left corner photo). Love that look!


2 comments:
This is so darling. I love the matching shirts. Cute!
Love this layout, and this post which is full of great tips! Your white embossing always looks so striking and neat! I need to practice that more. And of course, the photo of this beautiful family is precious. Thanks for sharing.
Post a Comment