

This little grandson guy never ceases to bring a smile to my face. In fact, yesterday as I was watching him while his big sister, Livvi was at chemo with her mom and dad, we were watching the Olympics together. I'm telling you, this little 14 1/2 month old was into it! We were watching the men's 200 meter qualifying heats and whenever they got into the starting blocks he would yell, "GO!" So cute.
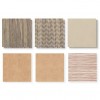
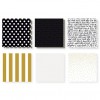
Anyway, back to the artwork. This layout showcases both the Rustic Home and Uptown Fundamentals paper packs. All I added was a bit of Poppy Cardstock, Black Cardstock and White Daisy Cardstock. This month, when you purchase the Whimsy, Adventure and Enchantment Fundamentals packs, you get to choose either the Rustic Home or the Uptown pack for FREE! You can do this easily, with one little click here.

The little detail I wanted to point out on this layout is the Poppy Cardstock polka dots. The black and white polka dot print paper is from the Uptown Fundamentals pack. When creating this layout I thought it would be cute to add a few Poppy polka dots to tie in the accent color I used on this layout. The polka dots on the paper are just larger than 1/2" so I pulled out my 1/2" punch and punched a few Poppy Cardstock circles and added them strategically to the layout. I love that they are just a tad but smaller than the white ones printed on the paper because it makes for a nice little edge around the Poppy ones. It was a simple but fun way to add a bit of color detail to this layout.
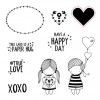
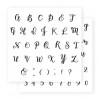
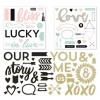
I used my Tuxedo Black stamp pad and trusty watercolor paints and brushes to create the little boy and balloons from the True Love Stamp Set (you can find this set on the back cover of our Annual Inspirations Idea Book. It is the set that is dedicated to helping Operation Smile. When you purchase this set, $7 of your purchase price goes straight to Operation Smile!). And, how about that dreamy font I used for Stade's name? I'll bet you thought I hand lettered it. NOPE! It is a brand new alphabet stamp set called Bistro Script that has become one of my new obsessions. Tip: when stamping this alphabet, you won't want to line those letters up on a long block. I suggest you stamp them one at a time so it's easy to connect them and make it look like it's hand lettered. Easy, peasy, but it makes all the difference! Also, notice the wood grain on the brown paper is actually embossed. Fancy, schmancy! I didn't emboss it. It came that way in the Rustic Home Fundamentals paper pack. Yes, please!
 |

Never fear! I have included a handy list of all the products I used on this layout, complete with links and photos at the very end of this post.


No comments:
Post a Comment